Tuesday, January 19, 2010

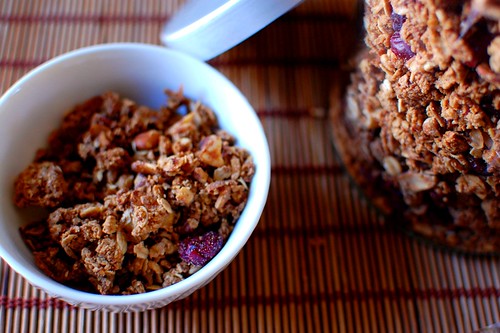
Seven Year Granola


I have a confession to make:  this granola isn't mine.  I actually got the recipe off of the Traveler's Lunchbox blog.  It took her seven years to refine it, thus the name.  The difference between this and other granola is the use of oat flour and brown sugar, the combination of which produces a super light and flaky granola.  I love this granola, even though I'm not really a granola person.  But I tried this recipe because it made me feel nostalgic, my mother would always make granola for us.  Anyway, I ended up making it for an entire summer a couple years ago.  It's easy to make, and mixes up pretty quick, and it's healthy.  And did I mention it's economical as well??  It lasts us at least a good week, and that's with us eating it like there's no tomorrow!
Anyway, I forgot about this granola until I stumbled across the recipe last week.  I thought I'd share.  Just a note before you read the recipe, if you don't have quick oats and oat flour, no prob!  Just do what I do and for quick oats blend regular rolled oats in a food processor/blender until they're about half their normal size.  Do the same for oat flour until it reaches a flour stage.

Seven Year Granola:

  • 3 cups quick oats
  • 2 cups oat flour
  • 3 cups nuts/seeds (I like to use a mix of almonds and walnuts, but play with it!)
  • 1 cup coconut (optional, I actually added this)
  • 1 cup brown sugar,  packed
  • 1/2 cup unsalted butter (I used salted, it's all I had)
  • 2 tsp vanilla extract
  • 1 tsp ground cinnamon
  • 1/2 tsp ground cardamom
  • 1/4 tsp mace
  • 1 cup Craisins
Preheat oven to 300 degrees Fahrenheit.  In a large bowl combine the oats, oat flour, nuts and/or seeds.  In a microwave-safe bowl or a saucepan combine the brown sugar, butter and water and heat just until the butter has melted and the mixture is bubbly (about 1 min. for the microwave).  Stir everything together until smooth, then stir in the salt, vanilla and spices.  Pour this mixture over the oats and nuts, stirring everything well to coat.  Let stand for about 10 minutes.
Spread the mixture out on a large baking sheet, separating it into irregular clumps with your fingers, and allowing space between the clumps for the hot air to circulate.  Slide into the middle of the oven and bake for 25-30 minutes, or until the top is golden brown.  Remove from the oven and stir, gently breaking up the mixture into small-to-medium sized clumps.  Return to the oven and bake another 15 minutes or so before stirring again.  Repeat the bake-and-stir until the mixture is a uniform golden brown and completely dry; this usually takes 1-1 1/2 hours (for me it took 1 1/4).  Add Craisins, if using.  Cool completely before using.  Store in a covered container at room temperature.  Serve with milk or yogurt and fruit as desired.
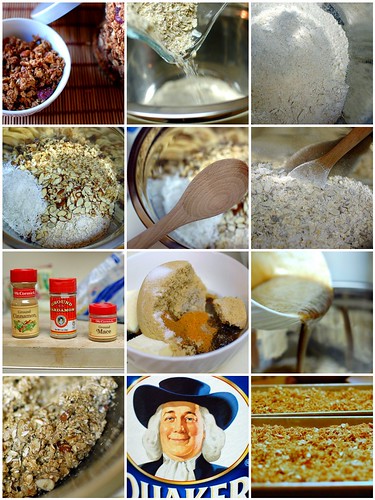


1. Finished Product, 2. Adding quick oats, 3. Oat flour, 4. oats, coconut and nuts, 5. mixing oats, nuts and coconut, 6. uniform mix, oat and more, 7. spices, 8. unmelted spice mix, 9. Melted spice and sugar mix, 10. Oats & etc. mixed with brown sugar mix, 11. the Quaker Oat Guy, 12. ready to bake granola

Wednesday, January 13, 2010

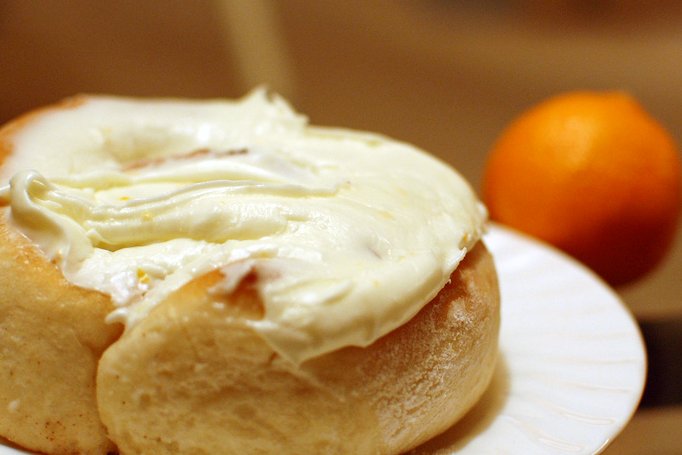
Holly Hipps' Sweet Rolls with Walnuts and Clementine


This recipe, unfortunately is not from Magnolia.  But, this is the first cinnamon roll recipe that I mastered. My mother has a divine, decadent one from the Lion House that I inherited. But I'm scared of it. It requires dough hooks for an extremely sticky dough, which results in a heavenly, moist cinnamon roll.  I used to make them perfectly, and then one day my world crashed down around me, and every time I made them they flopped. So, this is my standby.

Today, I made these rolls with the regular cinnamon-sugar filling.  Then I added some alterations: coarsely chopped walnuts and some clementine juice and zest to cream cheese frosting. The frosting is typically more of an icing, but I'm a cream cheese fan.  And I was the one making them.  The result of my hard labor?
I ate three.
By myself.
And I don't regret it. I'm excited for breakfast so I can eat more. Don said they were, "awesome". Which is high praise. Especially since he's not a frosting freak like I am. Some times I don't know how we got together.

The thing that I like about this recipe  is that Holly Hipps (a neighbor of my in-laws, and a baker to boot) has broken it down into a pretty idiot proof recipe (which I definitely needed until this last year before yeast and I became friends). Don almost didn't let me share this recipe, because it is held sacred in his family.  It's that good.  Did I mention that cinnamon rolls are fun to make?  It's the grown-ups way of playing in the mud.  I prefer to do everything by hand, stirring, kneading, spreading the butter, cinnamon sugar, etc.  There are very few tools and clean-up needed that way.  And it makes me feel like I'm five again, making mud pies.  That's where it all started.

So, here it is:

Ingredients:

Dissolve:      
  • 1/2 c. warm water
  • 2 TBSP dry yeast
  • 1 TBSP sugar
Melt together:
  • 1 1/2 c. water
  • 3/4 c. shortening
Mix:
  • 4 eggs, beaten
  • 3/4 c. sugar
  • 2 tsp salt
Add the cooled shortening mixture to the yeast mixture, You don't want to add it hot because you'll kill your little yeast friends.  Then add that to the egg mixture.  Blend well, and add 7 cups of flour.  Knead several times, place in a greased bowl in a warm, draft free place.  (I like to fill a glass 9" x 13" cake pan half full of the hottest water I can get out of the tap and place it on the bottom rack of the oven.  Then I cover the greased bowl, with it's contents, with a dish towel and let it rise). Let double in size.  You will know it is double the size when you stick your index finger in and it leaves an indentation in the dough.  Punch down (my favorite part), roll out to about 1/2-1/4 inch flat in a rectangle shape.  Soften one cube of butter, and spread with hands (or a pastry brush if you're a pansy) on the now rectangle dough.  Make a cinnamon-sugar mixture (I guest-a-mate, but it works out, I did 3 TBSP of sugar to about a 1/2 tsp of cinnamon) and sprinkle THICKLY over the butter.  There's nothing worse than bland cinnamon rolls.  Sprinkle with coarsely chopped walnuts.  Roll the long side to form a little cin-a-dough log.  Then, (and this is my other favorite part), take a string and slip it underneath the log, then switch both strands from one hand to the other so that they are crossing, pull, and cut sections measuring about 1 inch wide.  Place on buttered (because you're worth it) cookie sheet.  Repeat with remaining dough. Let rise until double the size.  Bake at 375 for 20 minutes (mine were a little less, ovens vary, so check on your rolls, if the smell done, they probably are). 

Frosting:
  • 3 TBSP butter
  • 1 pkg. cream cheese, at room temperature
  • 2 to 3 cups of powdered sugar
  • about 1 TBSP fresh clementine juice (or to taste)
  • 1 to 2 tsp(s) of clementine zest
Clementine Frosting:

Combine butter and cream cheese, beat with a mixer until light and fluffy.  Add sugar, one cup at a time until mixture reaches spreading consistency.   Add juice and zest.  The juice will change the consistency of the frosting, so you might need to add more sugar.

Alternate Icing:

  • 1/2 c. margarine/butter
  • 1 tsp. vanilla
  • 2 c. powdered sugar
Mix all ingredients and add enough canned milk until smooth.  Frost over cooled sweet rolls.

Spread icing/frosting with a rubber spatula on cooled cinnamon rolls.  Or, if you're like me, warm rolls since I can never wait until they cool to eat them, and I like the half-melted frosting look.
[erin's star signature]

Sunday, January 3, 2010

Aaaah, Magnolia

Look at what I got myself for my birthday.


I'm so happy.  Magnolia.  Or as, Lilly, my sister-in-law says, "Mongolia."  (She gets the two mixed up sometimes.  Even though one is a country and the other a flower. It's endearing, dearest Lilly.)  I have been in love with the Magnolia Bakery in New York since I picked up a copy of the Reader's Digest four years ago and they were rated as one of America's top bakeries.  Since then I have scoured the internet trying to find out top secret information about the bakery.  How do they do their swirl?  Are any of their recipes on the internet?  Then, a mere half week ago I found this beautiful cookbook.  It's what dreams are made out of.  It has everything from ice cream to sweetbreads to cheese pies.  Oh yes, cheese pies.  I had to have it.  Don't worry, I'll share.  Although, the cookbook still doesn't show how to do that dang swirl.

[erin's star signature]

Friday, November 6, 2009

Sourdough Starter

Sourdough starter is a thing I've feared for years. I was feeling ambitious back in my high school days and decided that I wanted to make some. I felt like I went on a wild goose chase, and all of my grand ambitions vanished. Two months ago, the ambition resurfaced. This time, I was more successful. That's not to say that I didn't run into problems. It's a very confusing process, trying to figure out how to get sourdough starter. It's also very frustrating. But, now I've done the work for you, and I'll give you the watered down version of how to get this marvelous little wonder food. And it is marvelous. In Alaska, during the gold rush days, sourdough starter was considered extremely precious because it was a source of food--baked goods no less. The workers would keep it in dough form, and put it close to their bodies while they worked so it would stay alive. And it is alive, those little wild yeast friend of ours.
So, think about that while you read the following. There are three kinds of ways that you can get sourdough starter:

  1. You can get some from someone who currently has starter.  People claim to have strains that came across the plains on the Oregon trail.  How cool is that??  There's also a website called King Arther Flour that sells sourdough starter.  Their strain of wild yeast was developed back East and has been around for over 250 years.  How cool is that??  Here's the link:  http://www.kingarthurflour.com/shop/yeast-baking/sourdough-and-starters.  You can buy an ounce of starter for about seven dollars, and it comes with instructions and recipes.    I really need to break down and buy some, because I'm dying to compare it to the starter that I made.  Which brings me to option number two:  make your own.
  2. You can make your own starter either by catching wild yeast that resides in the air, the flour that you're using, the potato water that you saved, the red cabbage leaf  or grape that you put in it.  There are lots of ways to capture wild yeast.  And they all have a slightly different flavor depending on your method.  This is the old school way, the way that all sourdough snobs swear by.  The one that old-timers will recall with fondness and tell you firmly, "You don't use anything in your starter except flour and water!!"...at least that's what Don's grandpa told us.  And this brings me to option number three:
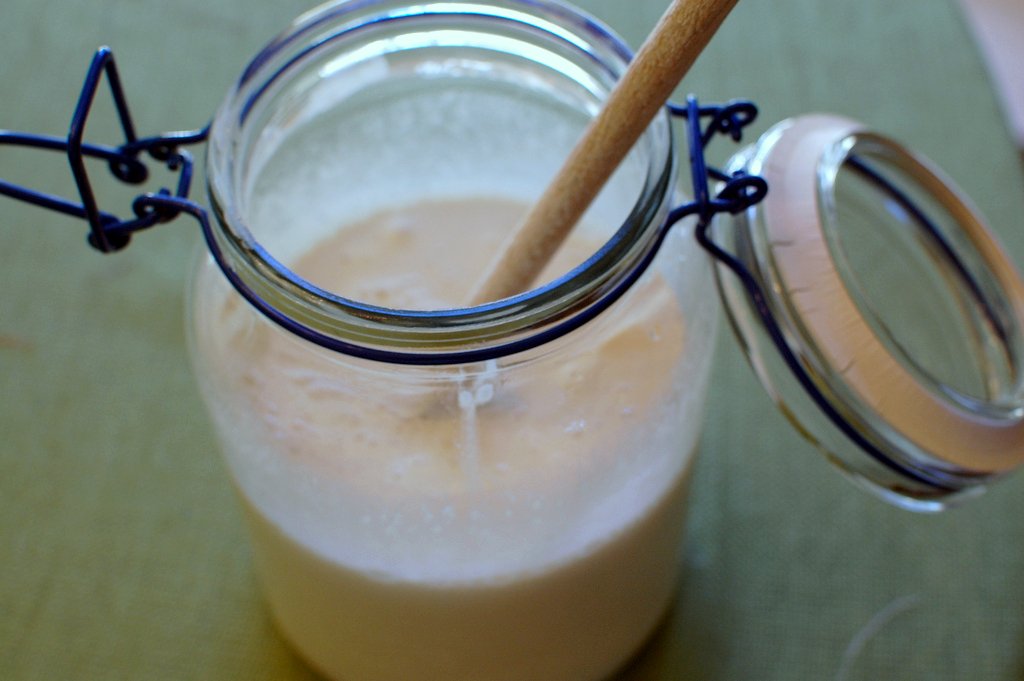
  3. You cheat.  By giving your starter a boost with domestic yeast.  That's what I did, and it's worked out loverly for me.  Don't tell Don's grandpa.  My little starter baby is now 2 1/2 months old, and thriving.  I gauge it's health by how well it works, and the amount of liquid (called "hooch" in sourdough language) that collects on the top.  Hooch is a good sign, and nothing to be afraid of.  It's kind-of like mild, harmless, beer...that won't get you drunk.  It's a byproduct that shows that your yeast is thriving.  If your starter is dry, stir it in, if it's just right, pour it off.  Oh, bytheway, should you make your own starter, and the bread doesn't taste very sourdoughy, don't worry, the starter will get stronger with time.  Here's a picture of what my starter looks like:


See the layer of liquid?  Hooch!  It's kind-of scary looking, I know.  Here's how it looks after it's been stirred in:

 It looks a little better now.   Here's the recipe for the starter, should you decide to make your own.  In later posts I'll show you how to take care of and use your starter.

Sourdough Starter
  • 1 pkg. active dry yeast
  • 2 1/2 cups warm water 
  • 2 cups all-purpose flour
  • 1 tablespoon sugar or honey
Dissolve your yeast in 1/2 cup of the warm water.  Stir in the remaining warm water, flour, and sugar.  Using a wooden spoon (you don't want to use any metal when working with starter, no metal bowls, spoons, etc.  It reacts funny with the yeast), beat until smooth (you don't have to get all the lumps out, it's somewhat impossible, as it sits the lumps will go away).  cover with a cotton cheese cloth (I just use a dish towel).  Let stand at room temp. for 5 to 10 days (the time will depend on how warm your kitchen is, the warmer it is, the sooner your starter will be done).  Stir 2 to 3 times a day until starter is bubbly and fermented.

Storing:
To store your starter you can use a glass/plastic/special sourdough crock that is about double the size of the amount of starter you have.  Make sure it has a lid, and make sure none of the starter gets on the mouth area, because the stuff acts like concrete, and it will be tough to get it off.  

I'll blog more about how to take care of your starter soon!  In the meantime, try it out, it'll surprise you with how uncomplicated it is.

[erin's star signature]

Why Engineers Don't Write Recipe Books

I got this in an e-mail from my Honey.;)  I don't think I've laughed so hard in a while.  My favorite part is where it has you use sieve size #10.  Five points to anyone who makes these cookies!

Chocolate Chip Cookies
Ingredients:

1. 532.35 cm3 gluten
2. 4.9 cm3 NaHCO3
3. 4.9 cm3 refined halite
4. 236.6 cm3 partially hydrogenated tallow triglyceride
5. 177.45 cm3 crystalline C12H22O11
6. 177.45 cm3 unrefined C12H22O11
7. 4.9 cm3 methyl ether of protocatechuic aldehyde
8. Two calcium carbonate-encapsulated avian albumen-coated protein
9. 473.2 cm3 theobroma cacao
10. 236.6 cm3 de-encapsulated legume meats (sieve size #10)

To a 2 litre jacketed round reactor vessel (reactor #1) with an overall heat transfer coefficient of about 100 Btu/°F-ft2-hr, add ingredients one, two and three with constant agitation. In a second 2 litre reactor vessel with a radial flow impeller operating at 100 rpm, add ingredients four, five, six, and seven until the mixture is homogenous.
To reactor #2, add ingredient eight, followed by three equal volumes of the homogenous mixture in reactor #1. Additionally, add ingredient nine and ten slowly, with constant agitation. Care must be taken at this point in the reaction to control any temperature rise that may be the result of an exothermic reaction.
Using a screw extrude attached to a #4 nodulizer, place the mixture piece-meal on a 316SS sheet (300 x 600 mm). Heat in a 460°K oven for a period of time that is in agreement with Frank & Johnston's first order rate expression (see JACOS, 21, 55), or until golden brown. Once the reaction is complete, place the sheet on a 25°C heat-transfer table, allowing the product to come to equilibrium.
- Anon

[erin's star signature]

Thursday, October 8, 2009

Grandpa Leavitt's Sourdough Waffles

For those of you who aren't sourdough fans, hear me out-neither was I. I recently learned that not all sourdough tastes sour. Me oh my. You can make almost anything with sourdough, anything that requires yeast, you can switch it out, it's a fabulous leavening. This has caused me to go on a sourdough kick.

A mere three days ago, when I made my own sourdough waffles for the first time. Had I had them before? Yes, I grew up on these babies, after all, I inherited the recipe from my mother. But, I had forgotten how fluffy, flavorful, and delicious they were!!! And so I made them again the other day, so I could share all of my loyal food blog readers, which I think consists of three people at the most. I'm not sure, so far only Launi has commented (thanks ShLauna, I love you!!) So, I bring you, sourdough waffles.

Ingredients:

  • 2 cups of overnight starter*
  • 2 eggs
  • 4 tbsp of oil
  • 4 tbsp of sugar
  • 1 tsp of salt
  • 1 level tsp of baking soda
Overnight starter
  • 2 cups of flour
  • 2 cups of milk
  • 2 cups of sourdough starter 
Mix until smooth and set aside for about eight hours (or overnight).  This replenishes and proofs your sourdough starter at the same time, making it so that the yeast is activated.

In the morning, take out the two cups of the sourdough starter needed for the waffles, and store the rest in your fridge.  (Or if you plan on using it everyday, there are specifically designed, dark crocks for sourdough starter, which will enable you to leave it out on the counter at room temperature.)

Next, Mix starter, eggs, oil, sugar, salt and baking soda all in a non-metal bowl.  NEVER, I repeat, NEVER use any metal when you are cooking with sourdough.  It causes a strange reaction with the starter.  So, mix with a wooden spoon.  It's good for your arm muscles.

Pour onto preheated and greased waffle iron.  The waffles will steam.  You will know that they are done when they stop steaming.

I love waffles.


Hello, darlings!  You make me so happy.  Seriously, I made this batch up just for me the other day (I halved the recipe) and didn't need to eat until dinner, but it was worth it.  Oh, yes.

Bon appetit!


[erin's star signature]

Wednesday, September 30, 2009

Bride's Biscuits

I am about to share with you my favorite biscuit recipe. It's from the same cookbook that the previous caramel sauce recipe is from,The Essential Mormon Cookbook.  I got it after I'd been married for a few months to Don, because I was all about being the cute little wife that sent him to work with cookies and stuff like that.  Over the years, the book has been worth it's weight in gold.   It is one of my favorite cookbooks.  The woman knows what she is doing, we'll just say that.

Anyway, it wasn't until this summer that I decided to try out this recipe.  I was raised on my Grandfather Leavitt's baking powder biscuits, and these are nothing like them.  They have yeast, which makes them taste like a cross between a roll and a biscuit.  They're good.  On the "Donald rating scale", which is how I rate all of my meals,  this one got two grunts...which has hardly been achieved in the four years that we've been married.  It's that good.
So, I give you.....
Bride's Biscuits!!

Here are the ingredients you'll be using:


We've got-

  • 1 pkg. active dry yeast (or in my case 2 1/4 tsp. = 1 pkg)
  • 1/2 cup warm water
  • 5 cups flour
  • 3 tbsp sugar
  • 1 tbsp baking powder
  • 1 tsp baking soda
  • 1 tsp salt
  • 1 cup shortening or butter
  • 2 cups buttermilk
Now, I don't know if you're like me or not, but I usually don't have buttermilk in my house.  I just don't use it that often.  So, I sour my milk by adding 1 tbsp of lemon juice/vinegar (whatever I have the most of on hand at the time) to 1 cup of milk, and then let it sit for 5 minutes before using it.  Here's a picture of how the sour milk looks after five minutes.  I like to do this step first, just because it makes me happy, and that way I have all of the official ingredients.

Next, you'll want to take your yeast and dissolve it in the 1/2 of warm water.  The way I get the water temperature right it by testing it on the inside of my wrist (this is a trick I learned from my mother) if the water feels too hot on your wrist, it probably is.  You want comfortably warm water for our little yeast friends to be able to work their magic.  It will take about 10 minutes for the yeast to dissolve like so:


Next, sift your flour, sugar, baking powder, baking soda and salt in a large bowl. Mine is an expensive looking blue plastic bowl...okay, it's a cheap plastic bowl that I probably stole from a college roommate.  But it works marvelously anyway.  It's a lot to sift, and I usually avoid sifting if I can, but for these biscuits it is vital for their nice, light texture.  It's worth it, just bare with me!

Cut in your shortening or butter.  I did half and half just to experiment, and they turned out pretty good.  But if you can do all butter, then to it..or you can use butter flavored shortening (which I never have, so let me know how it turns out).  Here's a little trick that I like to do whenever I use shortening, I hate, hate, hate having to wash the shortening out of measuring cups.  The greasy little bugger never comes out.  So, I do this:


Ta-da!  This way you can go on with your jolly 'ol baking, and not have to stop in between and try and degrease your measuring cup.  I know, it's life changing. Aren't you glad you're reading this??

Mix the butter/shortening with a pastry blender or two knives until you have a coarse meal.  Then mix in your yeast and buttermilk until the dough is just uniformly wet.
Like so:


Then the dough needs to rest.  Cover it and put it in the fridge for several hours before you bake it.  The great thing about this dough is that it can last up to one week in the fridge, making it so that you can just pull it out, roll, bake and have flaky biscuits ready in no time, and no one will know that you didn't slave all day.

I didn't take pictures of rolling out or cutting the dough, I was in a hurry and pretty hungry...and I forgot.  But, roll the dough out to about 1/2", and cut it with a 2 1/2" biscuit cutter...or, if you're like me and don't own a biscuit cutter, I use a wide mouth glass.  It works great.  (How is it possible to have a madeleine pan, but not a biscuit cutter??  I don't know, but that's where my priorities are.)  Place the biscuits on a greased cookie sheet and bake at 400 degrees for 15 minutes or until golden.  I love how these little puppies rise in the oven.  It's truely beautiful, and makes me filled with excitement.  I'm a simple pleasures person, and I really like food.  This will make about 3 dozen biscuits.

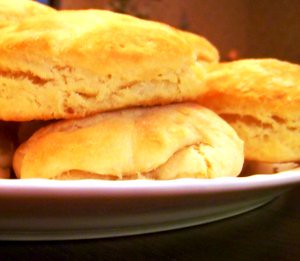
And here is the finished product!  These have always turned out, and like I said, they got two Don grunts, which is really, really, really good.  But then, he's a biscuit person.


[erin's star signature]

Caramel Sauce

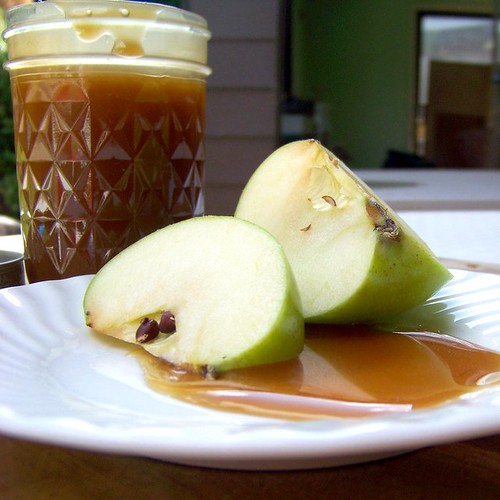
We are coming into apple season. I love apples. I love caramel. I like to eat them together and have a little bit of apple with my caramel. Car-r-r-r-r-amel.  Yum.  It even rolls off your tongue.  So, I've decided to share the recipe. It's a really nice sauce, and extremely easy.

Your ingredients are as follows:
  • 1 1/2 cups brown sugar
  • 3/4 c. light corn syrup
  • 2/3 c. heavy cream
  • 1/4 c. butter


Mix all in a saucepan and bring to a boil (one you can't stir down) over medium heat. Boil for 2 to 3 minutes stirring constantly.
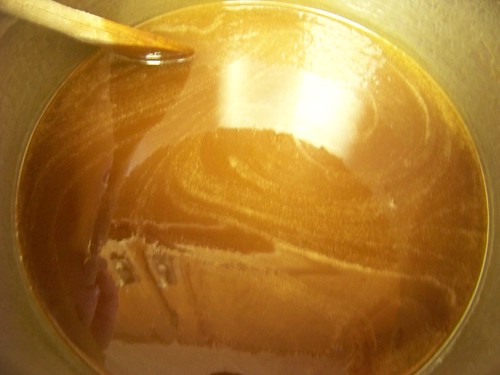
Here's a before and after picture of mine.  Before boiling:


And after:


It's amazing what a little heat will do. I found that stirring it for 3 minutes gave it just the right consistency.  It will still be a relatively thin sauce once you're done stirring, but it will thicken up as it cools. Car-r-r-r-amel.    This sauce is a lot easier than real caramel sauce, in which you have to wait for granulated sugar to caramelize and brown.  And it tastes just as good.

Devour with your favorite pears or apples.  I canned mine so I could give it away as a gift.


Happy Fall!

[erin's star signature]